Quantcast
Channel: Beautylish Editorial
Viewing all 767 articles
Browse latest View live

The Face Wash Series Part 5: Micellar Water

$
0
0

Micellar water is the hottest option for facial cleansing in France. Now it’s making its way in the United States — more and more women are choosing to incorporate the scientifically designed cleanser into their beauty regimens. But is it a fad or is it effective?

We talked to Dr. Eric Jourdan, the scientific director for the French skin care brand Bioderma to learn what exactly micellar water is (get ready: it’s all about molecular structure and something called “surfactants”), how micellar water works, and which micellar product is right for you!

Q: What exactly is micellar water and how does it work? 

A surfactant is a molecule whose head is directed towards water and whose tail is directed towards oil. Since the tails hate water (hydrophobic), in a water solution they will group together and form spheres, known as micelles. Micelles are tiny particles that remained suspended in water indefinitely. These micelles are capable of trapping impurities, dirt and excess sebum. The Bioderma micellar solutions do not require rinsing since the trapped impurities are removed by the cotton pad. They also preserve and strengthen the skin’s hydrolipidic film.

Q: What is the step-by-step process to apply micellar water?

Step One: Apply solution to the cotton pad where the micelles will open up. Cotton is hydrophilic, so the water-loving ends of the micelles are drawn to it.

Step Two: When the cotton is applied on the skin, the lipophilic ends will catch the lipids as makeup, excess sebum or pollution residue.

Step Three: Impurities are fixed to the cotton pad thanks to the micelles, then they are removed and thrown away with the cotton.

Step Four: Renew the application until the cotton is perfectly clean.

Q: What are the differences between micellar Bioderma products: Sensibio H2O, Sébium H2O, and Hydrabio H2O?

For sensitive skin, the micellar solutions in Sensibio H2O is formulated with a soothing and decongesting Cucumis sativus extract. Sensibio H2O is perfectly adapted to patients with intolerance to allergic skin thanks to its non-rinse and ultra-gentle hypoallergenic formula.

For oily skin with blemishes, Sébium H2O includes Fluidactiv, which limits the thickening of the sebum, thereby preventing the formation of blemishes. Plus, the formula includes copper sulphate, zinc gluconate, and antimicrobial agents, all which will purify the skin.

Finally, for dry skin, the Hydrabio H2O micellar water retrains the skin to stimulate its own natural hydrating capacities and retain the water that it needs, thanks to Aquagenium. Glycerine enhances this hydrating action and Cucumis sativus extract soothes sensitive skin.

Q: How often can you use it? 

As often as necessary!

Q: Do you need an additional cleanser to use with the micellar water? 

It’s not necessary. The micellar water is fine to use on its own.

Q: Is it okay to apply a moisturizer/product to the skin right after using micellar water?

Yes, a moisturizer can be used just after micellar water.


View Original Article

Drop the Bread: Reinventing the Sandwich for Health and Beauty

$
0
0

Whether you’re gluten free or playing up your eating-for-gorgeousness game, skipping bread much of the time can be a big step toward looking and feeling super bright. Here are some exciting perks of going bread-free, plus options so delicious and easy that you’ll forget you ever relied on the traditional sandwich for your daily “bread”.

Enhanced Digestion

Processed wheat flour used in typical American bread can cause inflammation, triggering pimples and redness on the skin as well as digestive challenges. The difficult combination of bread’s quick-digesting carbohydrates with protein-based sandwich ingredients contributes to the afternoon sleepy slump as well as bloating. Happy digestion from simple food combinations and unprocessed ingredients, on the other hand, equals clear skin and consistent energy!  

Bread Alternatives

When thinking outside the breadbox tasty alternate sandwich wrappers come to mind. Swiss chard, tender Napa cabbage, and collard leaves are nature’s easy traveling (and easily stuffed) wraps. Nori sheets, the yummy seaweed used in sushi, can be rolled into cones and stuffed with miso-veggies and brown rice. Romaine lettuce is another great option; assemble just before serving to avoid sogginess.

Filling Ideas

The idea is to create a roll or burrito. Stuff with your favorite filling; a few of mine include guacamole, sweet potato, nut butter, hummus or fish. Add plenty of raw veggies such as shredded carrot, cucumber or red pepper slivers, sprouts, and baby spinach; consider a splash of salsa or dollop of olive tapenade for a flavor spike.

Better Options if you Want Bread

If you have your heart set on bread, higher quality choices are yeast-free whole grain sourdough, sprouted, and gluten-free as well as sprouted tortillas. Though best not eaten every day, they offer whole food nutrition and better digestibility than their preservative-filled and bleached counterparts. Sleuth out food labels, looking for organic, sprouted whole grain, and yeast-free, avoid preservatives and bleached or unbleached white flour.

Salmon-Avocado Collard Rolls

I appreciate the vitality boost from eating wild-caught fish on occasion. Salmon and avocado are a sumptuous contrast to lively veggie fillings. The raw collard leaf wrapping is crunchy and sweet—it can also be lightly steamed. Leave out the salmon and step up the avocado for a vegan version. Makes 4 rolls.

  • ½ pound wild-caught salmon (canned wild salmon can work if fresh is not available)
  • 1” piece of fresh ginger, grated (optional)
  • 1 green onion, chopped
  • 1 avocado
  • 1 teaspoon or more dulse flakes
  • ½ teaspoon wheat-free tamari
  • 2 loosely packed cups baby spinach or sunflower sprouts
  • 1 cup of thinly sliced cucumber, red pepper, or celery
  • Lemon wedge
  • 4 medium-sized collard leaves, stems and thickest part of center vein removed

In a sauté pan, poach the salmon with optional ginger in 1 inch of water for approximately 2 minutes on each side, until cooked. Let cool briefly, remove any bones, flake the salmon and mash gently with the avocado, green onion, dulse flakes, and tamari. Place salmon mixture at the bottom of each collard green, top with spinach/sprouts, veggies, and a squeeze of lemon. Roll up like a burrito then pack it to go or slice in half and serve. Eat with love!


View Original Article

Brush Basics: The Small Angle Brush

$
0
0

They may be sold with a single purpose in mind, but each style of makeup brush has more uses than you might think! In this series, we will examine some of the most common brush styles and discover all the surprising things each one can accomplish. Today we’re looking at: 

The Small Angle Brush

The small angle brush is stiff and precise, made for creating both sharp, fine lines and wider striping. Similar in shape to a lip brush, it reaches hard-to-access areas like the lower lash line. It’s also a useful tool in creating wing shapes.

Here are some of our favorite uses for the small angle brush: 

Eyebrows

It’s generally billed as a brow brush, and for good reason– this brush shape handles every aspect of brow definition. The fine angle of the bristles provides a clean outline and offers a realistic effect when used to create the illusion of individual brow hairs. To fill in the inner brow in a sweeping motion, use the brush flat with the angle pointed downward.

Winged Eye Liner

Used with a potted liner, wet shadow, or a combination of eyeliner mixing medium and pigment blend, this brush is fabulous at creating dramatic winged eyeliner looks. Dip the tip of the brush in the desired lining formula (you can even sweep it over the tip of a soft eye pencil to pick up a lining color) and, with the long side facing the inner eye, drag it along your lid for a clean sharp line. Using the long end of the brush, you can draw that sharp point of a winged eye.

Extreme Lip Shapes

Looking to create unusual lip shapes that involve over and underdrawing? This brush is a great choice. You’ll be able to make cleaner lines along and over the bow of the lip and then fill in with lip color using the brush’s flat end. This is especially great for pointy and more geometric lip shape concepts.

Lower Lash Liner

This is a tricky area given the downward direction most lower lashes grow. The pointed angle of this brush makes it easier to reach directly beneath the lashes without creating a mess in the process. For defined lower lid lines and shadow, this brush will work wonders. It’s even great for retro hand-drawn lower lash styles à la Twiggy.

Abstract Illustration

Want to create geometric painted shapes or shade your cut crease like a pro? For more conceptual and editorial looks, this brush may well be your best bet. The unwavering shape will guarantee an ultra-crisp straight line anywhere you choose to draw, and the wide area will blend and fill in color for detailed work. If you’ve been wanting to be Ziggy Stardust, the small angle brush is your best “bolt”.


View Original Article

Summer Essentials For Beauty Lovers On The Go

$
0
0

Summer is in full swing, which means it’s time for jet-setting to exotic destinations. Or at least a day trip to the beach. If you’ve got wanderlust, we have a roundup of our favorite pint-sized products, perfect for slipping into a bag on your next excursion.

Pure Marula Oil Facial Oil Rollerball, $15 | Shop it

If you haven’t tried marula oil, you’re missing out. Cold-pressed from the nut of the African marula fruit, this light, fast-absorbing oil is packed with fatty acids and antioxidants to heal, hydrate, and protect. The ultra-portable rollerball makes it a perfect companion for long flights. Apply to lips, split ends, cuticles, or wherever dryness takes hold.

Lucas’ Papaw Ointment, $12 | Shop it

You’ve probably spotted this iconic red tube in many celebrity makeup artists’ kits, and for good reason: this is the king of all-purpose beauty treatments. Use it as a lip balm, dewy highlighter, moisturizer for hair, skin, and nails, eyebrow gel, frizz tamer, sunburn reliever, and so much more. The 25mg tube is just the right size to take with you wherever you go.

Eve Lom Daily Protection Broad Spectrum SPF 50 Sunscreen, $90 | Shop it

This is the summer that you’re going to start wearing sunscreen religiously, right? Lucky for you, we’ve got a luxury product that will make you forget the piña colada-scented tubes of your youth. This lightweight, oil-free cream is loaded with antioxidants to protect skin from classic summer party crashers: UVA/UVB rays, environmental pollutants, and free radicals.

Charlotte Tilbury Beach Stick, $45 | Shop it

When it comes to a radiant summer glow, Charlotte Tilbury knows what she’s doing. These beautifully-packaged twist-up sticks add a semi-sheer wash of color to lips and cheeks alike. Keep one (or two) in your bag to get a sun-soaked flush on the go, even if you’re nowhere near a tropical island.

Nudestix Mascara, $24 | Shop it

The heat and humidity of summer days call for a mascara that won’t quit. This sleek black tube offers creamy, buildable pigment that doesn’t smudge, clump, or flake—even after multiple coats. A must-have for anyone seeking long-lasting lashes.

Sachajuan Style Cream, $32 | Shop it

Drawing inspiration from one of our favorite summer hangouts, this styling cream harnesses Sachajuan’s Ocean Silk Technology to add natural shine and light definition to your ‘do. Use it as a heat protectant for a bouncy blowout or to tame frizz when you’re on the run.

IT Cosmetics CC+ Cream Illumination SPF 50+, $38 | Shop it

If you’re wondering how to pull off a multiple-step skincare routine while you’re on the road, IT Cosmetics has you covered. This dewy CC cream is like an anti-aging serum, daytime moisturizer, full-coverage foundation, broad-spectrum sunscreen, and subtle highlighter combined. Just one step to radiant, flawless skin? We’ll take it.

Bioderma Sensibio H2O, $6.95 | Shop it

We’re head-over-heels for this French import, and with good reason. Bioderma is a soothing, no-rinse micellar water and makeup remover that will revolutionize your cleansing game, especially if you don’t have access to a sink. Or if you’re just too lazy to get to one, which is totally acceptable. Hey, it’s summer.

Indie Lee Blemish Stick, $28 | Shop it

If your zits seem to pop up the second you leave the house, fear not. Eco-beauty guru Indie Lee has a blemish treatment for you. This tiny tube, packed with alpha- and beta-hydroxy acids, witch hazel, and camphor, gently exfoliates away oil and debris while fighting acne-causing bacteria. Dab some on with the doe foot applicator and watch your bumps fade away.

Alphabet Bags Natural Wash Bag, $36 | Shop it

Now that you’re fully stocked with travel-ready beauty supplies, you need a place to put them. Made from sturdy canvas, Alphabet Bags were designed with the makeup lover in mind—they come equipped with a black, waterproof lining that is easily wiped clean. This is the last time an uncapped eyeliner pencil ruins your perfect summer day!


View Original Article

Get Glittered: 3 Ways To Wear Sugarpill’s New Sparkle Polishes

$
0
0

We love nail polish and we love Sugarpill Cosmetics, so when we got word about their new range of nail shades, we couldn’t wait to get our hands on them. Or rather, get them on our hands.

With a slew of expansions in the works, Sugarpill is starting things off with The Heavenly Creatures collection: 10 confetti glitter lacquers that suit every mood and are guaranteed to turn your plain manicure into a party.

“I rest my chin on my hand a lot while I work, so I figured I may as well have pretty nails if they’re going to be in my face all the time,” jokes Amy Doan, founder of Sugarpill Cosmetics. 

The new line takes inspiration from stargazing, with glittery rainbow shades reminiscent of birthday cakes and the cosmos.

 “When we were little, my sisters and I used to stay up late in the summertime to watch meteor showers from our backyard,” Amy told us. ”Those are some of the best memories from my childhood. Now I love to go on night hikes to star gaze. I like staring into the unknown and making up stories about what’s out there. The answer is definitely cats and princesses.” (Spy the magical cat illustrated on each bottle.)

We think everyone could use a little glitter, but which level of sparkle is right for your mood? We’ve got you covered below!

Glitter Beginners: The Accent Nail

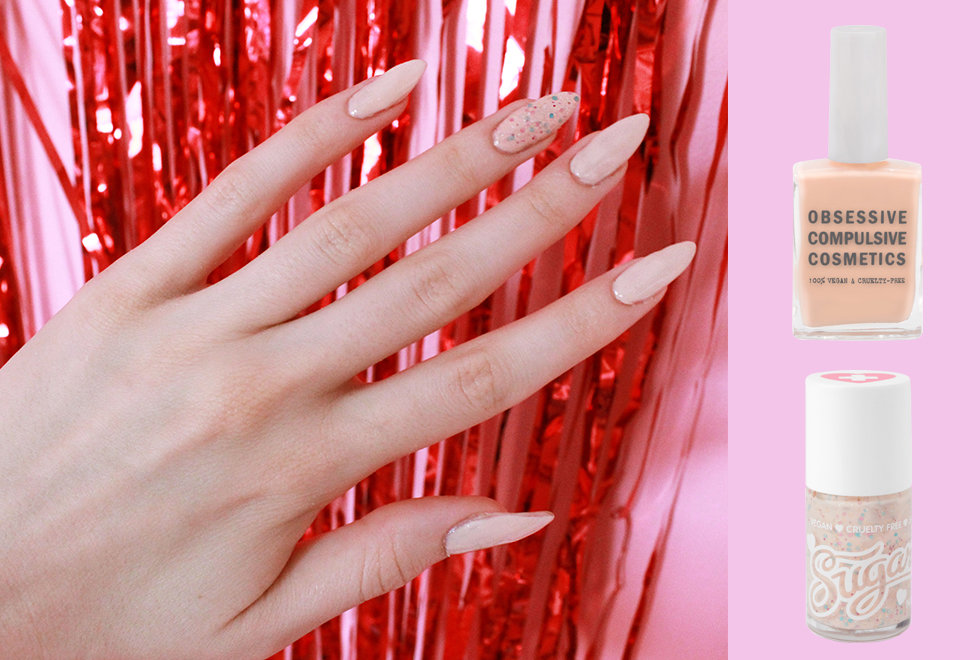
Forgo jewelry and paint a shimmering nail instead! “Glitter doesn’t necessarily have to be loud,” says Amy, ”We make softer shades like Angel Cake, Catmosphere and Cloud Castle, which are glitters suspended in a pastel base. The pastel mutes the glitter slightly for a more subdued effect.”

Tip: To put a little sparkle in your routine, pick one nail to glitter over and paint the rest with a favorite complimentary polish.

We used Sugarpill Nail Lacquer Angel Cake and Obsessive Compulsive Cosmetics Nail Lacquer in Mein Herr


Intermediate Sparklers: The Glitter Dip

A little glitter on your nail tips is chic and easy to DIY. Pick a favorite complimentary shade for your base color and paint on two coats. Next, paint a clear-based glitter polish, just on the tips. How far down the nail bed you want to paint, and how many layers of glitter you want are both up to you. It’s perfect for a special occasion, but, as Amy says, “Every day is a special occasion!”

We used Sugarpill Nail Lacquer in Electric Halo and Obsessive Compulsive Cosmetics Nail Lacquer in Anime


Expert Glitz: Paint it on thick!

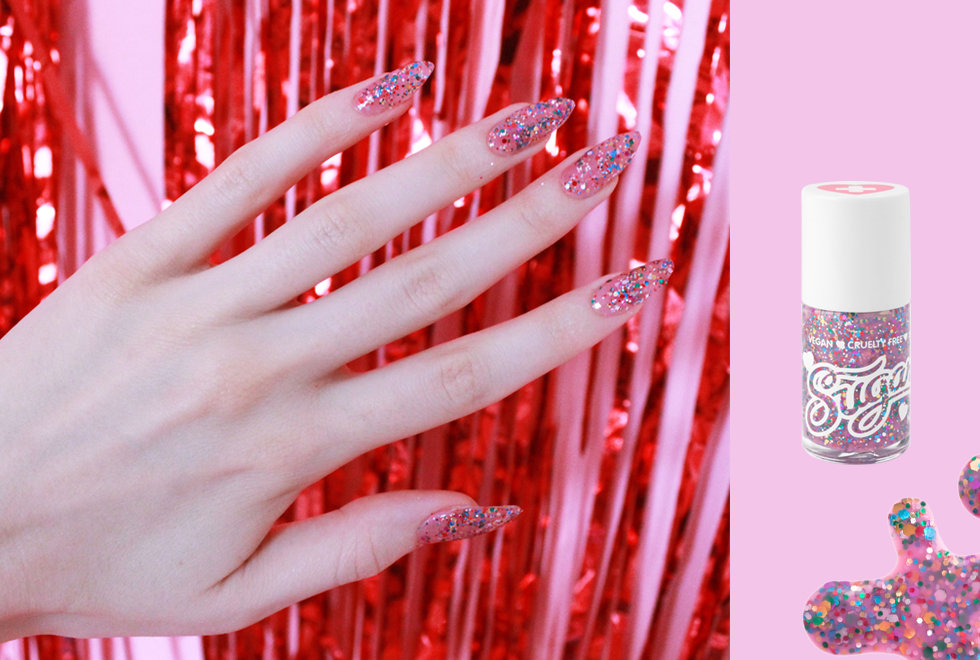
Hello, glitter addicts anonymous! Allow us to enable you. “The more you wear glitter, the more it becomes second nature, and before you know it you can’t live without it,” says Amy. Want even more glitter? “A lot of glitter fans who can’t get enough have been experimenting with layering different combos of our nail polishes to create the most amazing custom looks,” Amy tells us. “Our favorites we’ve seen so far are Electric Halo over Angel Cake, and Supermoon over Catmosphere! Actually, Electric Halo (holographic silver glitter) and Divinity (gold glitter) look amazing layered over everything.”

We used Sugarpill Nail Lacquer in Space Junk


View Original Article

Let it Glow: Pro Tips for a Radiant Complexion

$
0
0

In the summer, everyone wants a gorgeous glow. Keeping your makeup polished in the heat and humidity may feel like an impossible task, but stop sweating. Let’s start with one basic rule when it comes to modern summer makeup: less is more. You don’t necessarily need to give up your favorite products, you just need to find ways to make them work for the intensity of the season.  

Here are a few of my pro tips (plus some easy fixes) for a natural, effortless makeup application that will leave you aglow.

Exfoliate:

Using a gentle exfoliating product or even a soft washcloth helps remove dead skin that, mixing with perspiration, clogs pores. A good exfoliation will leave the surface of the skin freshened to give you a smoother canvas to apply foundation.

James’s Pick: Twinmedix Resurface

Tone:

Using a gentle toner is perfect for warm summer months. It removes excess dirt and cleanser, but it also serves several other purposes. Toner can help achieve the appearance of smaller pores, restore the pH balance  of your skin, and add a layer of weightless protection. A spray toner is also a brilliant way to add a little extra moisture for even the oiliest skins. This humectant’s properties are more subtle. With a simple spritz, you can refresh the skin and restore your makeup’s placement all day long.

James’s Pick: Embryolisse Rosamelis 

Moisturize:

The heat can quickly dry out your skin. Drink water (of course) and use a lightweight moisturizer to help your skin remain soft and hydrated this summer. You can keep it simple with a basic moisturizer, or, for some added protection, try one of the new breeds of products that contain sunscreen. You can also opt for a tinted moisturizer that will provide light coverage while protecting and fortifying the skin.

James’s Pick: rms beauty Raw Coconut Cream, $18 - $42 | Shop it 

Protect:

Even if your moisturizer contains SPF, you should use a separate sunscreen with a much higher SPF for added and necessary protection. A lightweight sunscreen that is safe for use on the face is a favorite in the kits of professional artists. There are many on the market that can match your personal preferences and price range. Look for a formula that is lightweight and dries quickly. Be sure to carry this product with you all day if you are enjoying time in the sun -- it will need to be reapplied.

James’s Pick: Eve Lom Daily Protection Broad Spectrum SPF 50 Sunscreen, $90 | Shop it

Cover:

My advice for summer weather complexion is to keep your foundation sheer and waterproof. Many makeup companies make waterproof and sweat-proof formulas that will withstand brutal summer temperatures. While most liquid formulas are not designed to give much more than sheer or light coverage, they can be an easy way to even out tone and allow you to simply conceal the spots that need additional cover.

James’s Pick: MAKE UP FOR EVER Face and Body Liquid Make-up

Bronze:

For a natural, sun-kissed, sophisticated glow, try brushing on a light powder bronzer. The powder will stay put and not smear like some liquid bronzers and will also add some additional setting properties. For the most natural look, choose a bronzer that is matte in finish and a hue that is one to two shades darker than your complexion. Apply the bronzer using a powder brush along the parts of the face that would naturally get more sun: start at your temple and follow the natural contour downward from your forehead across the highest point of the cheekbone. Add bronzer onto your chin and down the center of the nose. Finish by applying to any exposed skin such as shoulders or décolletage.

James’s Pick: Anastasia Contour Kit, $40 | Shop it

Highlight:

Summer is all about sun-kissed light, so it makes sense that we would add highlights to a face that we just warmed up with bronzer. Powder highlighters should add soft shine and subtle shimmer onto the areas of the face you wish to lift or illuminate. With a small detail brush, add a touch of luminosity to the brow bone, cheek bone, bow of the lip, and along the highest points of the collar bone.

James’s Pick: Kevyn Aucoin The Celestial Powder Candlelight, $44 | Shop it

Set:

Powder is not the only product designed to keep things perfectly put. I recommend using a setting spray to keep your makeup from moving. Choose a lightweight, long-lasting, professional setting spray. Keep it twelve inches from the face and apply in an even stream to set makeup and bring back shine to the skin. Have a touch-up powder on hand to remove excess shine, especially down the center of the face.

James’s Picks: Model In a Bottle Setting Spray;  Inglot SSS Powder

Final Touch:

Complete this gorgeous summer glow with other waterproof products that stay all day even in intense summer conditions. Waterproof mascara, waterproof cream shadow and liner, and a soft, high shine lip will add to your glow. Just be sure to avoid hard lines and edges. Most of all be sure to have fun and let that inner light shine through. Your glow is guaranteed to stay looking great.

Image: E+/Getty Images

View Original Article

Clown Contouring: Wayne Goss Breaks Down the Latest Craze

$
0
0

Just when you thought you’d seen every contouring trend on the planet, makeup artist and brush designer Wayne Goss brings us the latest: clown contouring. If the name makes you want to head for the hills, hear us out. As you’ll see in the video above, the end result is anything but carnivalesque.

Clown contouring has actually been around since the 1960s, according to Goss. He goes on to describe it as a technique that’s similar to regular highlighting and contouring except for the addition of color, which adds definition and brightness to the face. The trick, Goss explains, is to use shades of pink and fuchsia for extreme color correction. This exaggerated method of highlighting, contouring, and color correcting may look like circus face paint at first, but it blends down to a flawless, multidimensional finish.

To get started, you’ll need the following supplies:

Shop all Wayne Goss Brushes—handcrafted in Japan with luxury, cruelty-free natural bristles—below.


View Original Article

Introducing: The Original IT Girl

$
0
0

We bet you’ve done it: daydreamed about quitting your day job to work on a passion project that brings you fame, fortune and the worship of millions. Then, in the middle of your reverie, your calendar alert snaps you back to reality. You’re late for your 2 o’clock. But the fantasy lingers. What would it be like to become your own boss, the head of your dream company?

Ask award-winning beauty’preneur and founder of IT Cosmetics Jamie Kern Lima, and she may suggest that once your daydream becomes a reality, you don’t get much sleep.

It’s 8am on a warm Friday in June, on the 3rd floor of a nondescript office building nestled along Jersey City’s waterfront, where IT Cosmetics thrives in reality: suite of cubicles, cubbies, kiosks, displays, boxes, and busy-ness. Sitting down in a large glass conference room was the original “IT Girl” herself, giving us few moments of rare free time to talk candidly about how she went from broadcast journalist to makeup mogul.

“I was spending my career anchoring the morning news, then I’d have to cover [everything from] ‘crisis in the classroom’ to murders.  It wasn’t fulfilling in the way I expected,” the poised and joyfully energized Jamie explains.  ”I knew after a few years, God didn’t put me on this earth to report crime for ratings. It didn’t speak to my soul."

Jamie admits she spent excessive time and money in search of makeup and beauty products that met her unique challenges and helped her look good in front of the often unforgiving HD television cameras. After developing severe rosacea and enduring newscast mishaps (like accidentally wiping away her penciled eyebrow on-air), she needed products that worked. “I didn’t really feel like there was a brand that was offering solutions in a way that worked. There are some brands that are very fun about it, but not in ways that solve problems.”

With creating those real solutions as her mission, Jamie partnered with a team of plastic surgeons and dermatologists and in 2008, IT Cosmetics was born. Jamie and her team were engaging Korean labs long before the cosmetic industry’s love affair with the Korean beauty scene. They formulated their CC cream in Korea, for instance, “because of how they were able to get a physical sunscreen and full coverage into a product that starts its life as an anti-aging serum and moisturizer. I now hear daily from customers who say this product has completely transformed their skin.” Jamie reveals. “I have to feel like the product solves a problem in a better way. If it doesn’t, we won’t launch it.”

It’s also Jamie’s refreshing vulnerability and transparency as the face of IT Cosmetics that has won her a devoted following, especially on QVC. Prior to IT’s launch on the network, cosmetic brands were known for showcasing “after” looks with models who had near-flawless skin. Jamie changed the game on the channel by revealing her own thinning brows and rosacea live, on-air, to help demonstrate her product’s effectiveness.

Now, with over 250 appearances on QVC per year, Jamie and her legion of “IT girls” with real skin problems are baring it all, around the clock. Jamie adds, “It’s something bigger than ourselves. I think there are millions of women out there … who are used to seeing an image of perfection and not used to seeing women who have the same issues they do." 

As for what’s next, fans can look forward to the expansion of IT Cosmetics products to include an even greater variety of shades and the launch of IT’s new on-air infomercial. The original “IT Girl” herself is also not planning on slowing down any time soon. “I’ve always thought I worked hard. But I never knew how hard running a business would be,” she said, smiling. ”You are your brand and you never stop thinking about how to make sure you’re making products in the right way."

Our conversation was coming to a close and Jamie’s assistants poked their heads in to remind her of upcoming commitments. But there was one last thing the IT Girl was eager to share with us. We headed up to the fifth floor to see IT’s new home, under construction — a space big enough to house the young brand’s quickly-multiplying staff and abundant possibilities. Though the space very much in progress, we could tell by Jamie’s face that she saw everything as if it were already complete — as if she daydreamed it, all those years ago.


View Original Article

The Right Way to Use Sunscreen

$
0
0

This season, you are probably spending every moment you possibly can outside (remember winter? let’s not). Our skin is exposed and vulnerable more often than we realize—driving around with the windows down, having lunch on a restaurant patio, enjoying a stroll in the park—and exposure to damaging rays is no joke. Putting on sunscreen should be as normal a part of your beauty routine as your favorite mascara.

Now is the time to make sure you’re using the right kind sunscreen and that you’re also using it correctly. Remember, the sun doesn’t have your back, it burns it. 

Beware of high numbers.
Cast a wary glance at sunscreens that boast an SPF higher than 50. SPF (or sun protection factor) is basically a number that translates to how long you can stay exposed to the sun without burning. For example, SPF of 15 means that it will take 15 times as long for your skin to burn. When the number gets to over 50, that’s where the rule doesn’t apply. An SPF of 30 to 50 is adequate enough. 

Look for “broad spectrum” formulas.
Did you know that there are two types of rays that the sun emits? They are UVA and UVB. UVA can damage skin on a more deeper level, while UVB is the ray that causes sunburns. Broad spectrum sunscreens protect against both UVA and UVB rays. Try: Eve Lom Daily Protection Broad Spectrum SPF 50 Sunscreen. 

How much to use.
You know how it’s recommended to use a quarter-sized amount of shampoo when washing your hair? With sunscreen it’s the opposite. You’ll want to use an ounce, which equals out to about the size of a shot glass.

When to put it on.
Your skin needs to soak up the sunscreen in order to give proper protection. You can’t just slap some on and immediately run outside! Apply the lotion about 15 to 30 minutes prior to stepping out in the world.

Put in on everywhere.
You’ll want to make sure you get all of your body’s exposed areas. Watch out for the back of your neck, shoulders, chest, ears and even your hands! 

Don’t forget to reapply.
Even if a sunscreen is waterproof, it can still be wiped off with a towel or come off when sweating. Make sure to reapply every couple of hours. If you’re in the pool, reapply as soon as you get out.

Your pucker needs protection too.
News flash: lips can fall victim to sun damage too, and sunburned lips are a hell all its own. Protect them with a lip balm that contains SPF. Try: Anna Sui Protective Lip Balm.

Image: Image Source / Getty Images

View Original Article

Nail Art Superstar: Amy Wong

$
0
0

Amy Wong has always been a creative at heart, even dabbling in graffiti and street art-inspired work. But after her sister took her to a salon in Toronto that specialized in Japanese nail art, Ms. Wong found her calling, and dove headfirst into the practice. In 2014, she began posting her designs on Tumblr, soon followed by Instagram, which now serves as the main portfolio of her work. After only a few posts, one of her designs was featured on Nail It! Magazine’s Instagram page, as well as on Zooey Deschanel’s blog, HelloGiggles.

An accountant by day, Wong often goes on house calls for nail appointments at night. Amy is passionate about pursuing a career as a nail artist and plans to attend nail technician school this fall. She would love to work on photo shoots, film/tv/video sets, and for celebrities. As for her dream client? Nicki Minaj! “I would probably give her nails a cool abstract negative space type of design. Something fun but simple,” says Amy. Negative space manis are her favorite trend because it “creates such a sleek look to any nail design.”

Follow her on Instagram at @noriandee and her Tumblr.

“With this design, I was really inspired by patterns and colors and wanted to do something different with the evil eye design.”

“I wanted to do something really different with snowflakes, so I decided to make them abstract. I really liked the idea of having designs on the tip and a smaller design at the base of the nail.”

“This also came about after a failed design. I wanted to go for a ‘60s vibe, so I chose orange, blue, yellow and mint green. I added the black lines to make it pop.”

“I was inspired by the artist Kesh. Her abstract designs are awesome so I decided to do my nails after her designs.”

“I wanted to go for an ‘80s type vibe so I chose pastel blue and pink colors with yellow and added random shapes.”  

 “I had another design idea but it didn’t turn out well, so I think from that design I decided to create something more simple and came up with this.”


View Original Article

Eyeliner 101: Find the Best Tool for You

$
0
0

Eyeliner is bigger than ever this summer, and it looks like the trend is headed straight into the next few seasons. But with so many different options of liner out there, choosing the right one can be overwhelming — which is best for a smokey eye? What do you use for a sophisticated, lashy style? What about that crazy look you are cooking up for a night out?

It all makes sense once you know the various formulations of liner and what each can accomplish. Here is a look at the products available and how each one can help you create the looks that will have everyone talking. Let’s get you educated! 

Pencil eyeliner
Pencils are a must-have for every makeup bag. Used to achieve any look from soft and smudgy to deep and dramatic, pencils are easy to use and great for beginners and pros alike. Pencil liners allow you to line inside the eye, around the lash line, and can even be used as a base to intensify any eye shadow. They come in a variety of formulations ranging from typical wax formulas to traditional Kohl’s and, now, even long-wear waterproof options. The trick with pencils is to be sure you are choosing the formula that works in your environment and its placement in your makeup design. For inside the eye, my preference is Kohl or waterproof because both tend to be longer-wearing and more densely packed with pigment. Always be sure your pencil is sharpened and sanitary. Hold it like a writing pencil and use the whole tip, not just the point, to draw in your desired shape.

Liquid liners
Liquid eyeliners are a classic cosmetic product. First developed for use in film, they were integral in the  iconic makeup looks of the fifties and sixties. Liquid eyeliners are great for applying sophisticated cat eye looks, soft kitten kicks of color, or any of the sharp lines or graphic shapes we are seeing this season. Highly pigmented, these liners can look less dimensional then other types and come off a little flat, but they can be combined with other formulations to achieve more dimensional looks. Liquid eyeliners require a more steady hand and precise application. For more control, try the options in a more modern pen style applicator. Another tip to make applying a bit easier; create the shape with taupe eye shadow first and trace right over it with your liquid.

Gel eyeliner
There is heated debate in the beauty world when it comes to gel eyeliner vs traditional liquid eyeliner, but I believe they are not interchangeable. Each has very different properties and finishes. Liquid eyeliner lovers can’t get enough of the immediately sharp line that liquid will make. Gel eyeliner tends to be more generous and pliable, allowing you to build your line to the desired amount of drama. Gel eyeliner can also be easier for those that are not as skilled in liner application. It allows for more versatility, and can be used to create crisp hard lines or less dramatic, smokey effects. I also love dotting gel eyeliner along the lash line to create the illusion of a thicker lash. Gels tend to be longer lasting and waterproof, but unlike a liquid, they require the use of an additional brush.

Cream liner
Cream liners are the close cousin of the gel liners. They tend not to have the durability or wear of the gel formula, but many artists consider cream liner and gel liner to be interchangeable.

Powder eyeliner
Powder eyeliners offer endless possibilities and come in a variety of packages. They can be applied by choosing your favorite eye shadow and applying with a stiff angled brush the way you would use any other liner. This allows you to employ an endless array of colors and textures to achieve any makeup you might wish to design. Powders are ideal for a smokey eye and tend to be long-lasting. They can also be combined with other liner formulations to achieve the red carpet looks of your favorite celebrities.

People have been wearing pigment on their eyes since the time of ancient Egypt, and there may be no makeup more powerful in creating an impactful look. In one immediate swoop, eyeliner can reshape an eye, adding depth and dimension. While every formula has its own identity and advantages, my recommendation is to combine a few formulations for a look that is not only longer-lasting, but has presence and placement that is unforgettable.

Image: E+ / Getty Images

View Original Article

Upgrade Your Self-Tanning Routine With This Tanning Tool

$
0
0

It’s nearing the end of summer, and you’re a little bit dismayed—you never got your tan on. No need to make a frantic last-minute trip to the beach or buy a Groupon for a tanning salon. There’s an easier and safer way for you to add some color to your cheeks (all four of them).

How will you make the transition from a pale moon tan to a J-Lo glow? Self tanner, of course.

But can you do it subtly, without looking like a striped, orange tiger? We’ve found the tool that solves your problem: the bodyblender, a bigger version of your favorite makeup applicator, beautyblender.

The bodyblender features the same rounded end as the beautyblender, but is twice the size, so you’re able to evenly cover your body’s curves and easily get in those nooks and crannies. Plus, your hands remain free and clean while you apply your self tanner, bronzers, body shimmers or glitters.

If you’re looking for a new self tanner, we recommend St. Tropez Self Tan Luxe Dry Oil. It can give you a golden glow lasting up to 10 days, and it is made with an all-natural tanning agent that is derived from plant sources called dihydroxyacetone (DHA), that works with every type of skin tone.

Here are some expert steps to getting a gorgeous faux glow: 

1. Shave and exfoliate your skin at least eight hours prior to application. Aside from getting rid of dead skin cells and leaving your skin smooth and even, this also ensures that the tanner will go on more evenly and last longer. Use a light moisturizer all over and to take care of any dry spots. Try: Bliss’ Hot Salt Scrub.  

2. Wet the bodyblender with water and squeeze out the excess liquid. You can use a small towel to squeeze out the excess moisture as well. 

3. Pour a small amount of self tanner onto the bodyblender. If you’re using St. Tropez shimmer oil, make sure to shake the solution well before using. 

4. Start “bouncing” or stippling the sponge over the areas you want to get tan. Apply the self tanner one section at a time. Start at the bottom of your body and work your way up, saying goodbye to your pale thighs. Do your arms and hands last. It’s best to stand during application so the tanner won’t rub off on any of your furniture.

5. Before getting dressed, wait about five to ten minutes or until your skin feels dry to the touch. When you’re finished, thoroughly rinse out the sponge. Use the Liquid Blendercleanser to keep it clean. And don’t forget to wait at least four to eight hours before dipping into that pool!

Illustration by Walt Gorecki

View Original Article

Blush 5 Ways: Which Is Right for You?

$
0
0

We like to think of blush as pretty foolproof. There’s no detail work to master, no lines to stay inside of, and it looks great on everyone. But we also think that there’s a little more to applying blush than just dusting it on. Carefully placed blush can manipulate the appearance of your face shape in sneaky ways, and without much effort (we’re not talking about those trendy seven layer step systems). Play around with the looks below to find what application meets your own beauty needs. The results may surprise you!


Center Blush

For those who wish to soften their bone structure or have a square-shaped jawline, this can be a game changer. Apply rounded bursts of blush to center of the cheek– right on the apple. It will have a rounding effect on your entire face. What’s more, center blush can have a widening effect on the eyes. Done correctly, you’ll look like a doll.


Lower Blush

If your face features a long or prominent chin, you can even things out by placing your blush just below the apples of your cheeks– over the bone. This creates the subtle illusion that the apples of your cheeks rest a bit lower, and will elongate the upper part of the face to keep you looking balanced.


Upper Blush

Popular in Japan, blushing underneath the eyes can create an either sickly, or youthful appearance that might be seen as an extreme for some. However, applying your blush up high can make a short face appear extra long. For those with small or round faces, it’s worth a try– keeping the blush just above the apples is a happy medium to blending it into your eye makeup.


Outer Blush

Contour blush (shading around the cheekbones and temples) can draw focus to the center of the face– a plus if your face is on the wider side. Do too much and you’ll look like a Ziggy Stardust revivalist (no complaints here!), but do a little and you’ll find it to be a subtle way to add structure without joining the contour club.


Full cheeks

It’s not for everybody, but BIG BLUSH can work magic on those with large or long faces. Coloring outside the typical blush lines can shorten the face significantly and even shape it, depending on whether you apply rounded pats or sweeping strokes. Try it with a subtle shade and skip the heavy eye and lip looks. That will keep your cheeks the major statement.


View Original Article

Easy At-Home Brow Maintenance

$
0
0

There’s nothing worse than getting a fresh bang trim, then immediately looking in the mirror and realizing that your eyebrows are a total mess. Before you shame yourself for ignoring such an important part of your beauty routine, cut yourself some slack. You can take simple precautions to make sure your brow game is under control, no matter what your calendar looks like. Rectify your brow game so it’s always on point— at home!

Determine the shape

First things first, using a makeup brush as a ruler (or any other straight edge), measure a straight line from the edge of your nostril up to the inner corner of your eye and up to the eyebrow. This is where your brow should start. Next, measure a line from the same edge of your nostril to the outer corner of the same eye. This will be where your brow ends.

Fake it ‘til you make it

To create the perfect arch, fake it with a brow stencil! With five shapes to choose from, Anastasia’s Stencils are the ideal tool for this. Complete the look by using a duo kit like Nudestix Eyebrow Stylus Pencil Gel. The angled, easy-to-use pencil is available in four different shades, and comes with a waterproof stay-put gel and spoolie to help you achieve the arch of your dreams.

Clean up strays

After using the stencil to figure out where your arch should be, you can clean up any excess hairs with a tweezer, like the Purple Reign Petite Tweeze Set from Tweezerman. Use Anastasia’s After Tweeze Cream to dull down any redness.

Know when to trim

A kit like Tweezerman’s Brow Shaping Scissors Brush will help maintain the length of your brow hairs. Use the mini spoolie brush to comb your eyebrow hairs up. The hairs that stick out above your line can be trimmed with the scissors.

Know when to tame

After filling in your brows with a pencil or powder, make sure your hairs stay in place. You don’t want your hard work getting undone so quickly! Dab some of the Nudestix Brow Gel from their Eyebrow Stylus Pencil Gel on your brows to settle down any unruly hairs. Don’t you feel more relaxed now?

Image: Christopher Robbins / DigitalVision / Getty Images

View Original Article

RAEviewed: BY TERRY Contouring Compacts


Mila Moursi: Hollywood’s Most Sought-After Skin Care Specialist

Seasons Change and So Does Your Makeup

$
0
0

Sad but true: summer is long gone. And now, not only do you have to change your wardrobe, but your makeup kit needs to go through a transition as well. The change of seasons is a good time to replace mascara, restock your skin care products and reexamine your daily makeup application. But it’s also a time to try out new things. Here are a few of my favorite must-have makeup kit recommendations to help you transition effortlessly into autumn. 

Exfoliant– Slough off the dead skin and the effects of summer’s excessive sun and partying with a gentle exfoliant. This will remove the surface that’s been exposed to the elements and stimulate circulation so the new skin is healthy and polished. It’s a perfect way to make your foundation application flawless. 
James’s suggestion: Koh Gen Do Soft Gommage Gel

Vitamin treatments – Skin serums and treatments containing vitamin A, C and E applied before your daily moisturizer help repair summer damage and prepare your skin for the tough winter months ahead. Even if you do not live in an area where temperature changes drastically, the toll of holiday parties and the increase of time spent inside will be ameliorated with the help of these powerful antioxidants. 

Foundation – You can use the change in the seasonal calendar to give you a kick in the pants to try a new foundation. This season, for example, we are seeing more matte skin on the runway. Try a sheer liquid foundation with a matte appearance for a more polished look. Quite a change from the high, dewy complexions of the summer months!

Bronzer – Just because you aren’t on the beach doesn’t mean you should stop adding warmth to the skin. Try a matte powder bronzer or multiple-use cream to create a gorgeous and natural glow. Only apply bronzer where sun would naturally warm the face (forehead, nose, chin and highest point of cheekbones are a great start). 

Mascara– Your mascara should always be replaced every four to six weeks. Use the transition of seasons as an excuse to splurge on a new one! This season is all about full, voluminous lashes. Try one of the new bold, black mascaras for an exciting look, but if you always wear black, black mascara can make you look a little too goth. Get lash volume with a warmer color like a rich brown.

Black Liner – Whether it is to create unexpected graphic lines or classic kitten eyes, black liner is as popular this season as ever. The new liquid pens are perfect for delivering a range of looks from naturally polished to perfectly unexpected. Try combining your liquid pen with a black shadow underneath to give your liner more dimension. 

Metallic Eye Shadow –  This season, the runway in every fashion city reflected back a gilded effect on eyes, from warm copper and bronze to beautiful yellow and rose gold shades. For your kit, keep it simple with a wash of powder shadow. Brush your favorite metallic shade across the lid from lash to crease, or pick up a metallic pencil — the Midas touch with a more subtle effect. 

Burgundy Lip – Grunge is back! Bold, blackened berry shades and deep, rich burgundy colors are returning to the lip. Get vampy with a beautifully matte lipstick or keep it more modern with a gloss. The look will be less goth, more gorgeous, and fully fall fashion.

Image: ONOKY / Getty Images

View Original Article

Straight Talk: Would you try this Korean eyebrow trend?

$
0
0

Move over, France. South Korea has quickly become one of the biggest players on the international beauty scene. From BB cream to snail slime to sheet masks, there’s no shortage of Korean exports that have taken the world’s cosmetics aisles by storm. And while certain trends may never catch on like they did in Seoul (we’re looking at you, gradient lips), we were delighted to come across beauty blogger RAEview’s video on a K-beauty look that seems destined to outlive the hype: straight eyebrows.

In her video tutorial, RAEview walks us through the process of transforming our power arches into soft, straight-across brows that add youthfulness to the face. By carefully shaping individual hairs and minimizing sharp angles with concealer, she tackles the trend in a way that’s easy for anyone to follow. Ready to set your brows straight? Grab the supplies below and click on the video to see the tutorial.

To follow along with RAEview, you’ll need these items:


View Original Article

Macabre Makeup: Alex Faction’s Creepiest Halloween Looks

$
0
0

If you haven’t been following Alex Faction’s Halloween tutorial series on YouTube this October, you’re missing out on some seriously spooky looks. The Chicago-based makeup artist’s flare for haunting special effects makeup is sure to send shivers down your spine. To celebrate Halloween, we chatted with Alex about his journey as a makeup artist and included a few of his creepiest looks for your viewing pleasure (ahem, horror).

Watch Alex Faction’s Mummy tutorial

What inspired you to become a makeup artist?
I actually started off as a hairstylist, but had always had an interest in makeup. My cosmetology program was very small, so I was taught just enough to spark my interest. I took to YouTube to learn more about makeup. I fell in love with makeup, but I also fell in love with YouTubers at the same time because they gave out education for free. It was so inspirational. Once I learned a little bit of makeup, I decided that it was time to give back by starting my own YouTube channel. It started as a resume gap, but then it became my calling.

Watch Alex Faction’s Zombie Nerd tutorial

How did you get into special effects makeup?
When I started my YouTube channel, I didn’t have models waiting outside my door. I thought, What can I do on myself that’s fun and artistic and expressive but more ‘me’? That’s when I started doing special effects and face paint. I was shocked at how much I loved it. That’s how Alex Faction on YouTube was born. It was an accident—but the perfect accident.

Watch Alex Faction’s Werewolf tutorial

Do you approach special effects makeup differently than you would a more everyday look? 
I’ve noticed that I take beauty techniques and twist them. I always start with a face paint base, which is like my foundation, and I highlight and contour as I traditionally would with beauty. I always go back to my beauty makeup roots.

On my YouTube channel, I try to use eyeshadows and contour powders and creams that you might already have. Instead of using face paint, you can use a pigment and a foundation and mix them together. I try to be as accessible as possible.

 Watch Alex Faction’s Superman tutorial

What’s one thing in your kit that you can’t live without?
If I had to pick one thing, it would have to be a cream, like a Make Up For Ever Flash palette or another cream palette. You can mix creams together to create natural beauty tones, or you can mix them to create special effects. You can do so much with them. Also, I’d say an eyeshadow palette. A big one that has vivid colors, neutral colors, warm colors, and cool colors. If you have an eyeshadow palette and one brush, you can do anything.

Watch Alex Faction’s Crazy Clown tutorial

Tell us about your YouTube channel. How did it start?
It’s been about two-and-a-half years since I started it. I just had this entry-level camera and a lamp from Target that I pointed at my face. I had three or four NYX eyeshadow brushes and one BH Cosmetics eyeshadow palette, which were all, like, a dollar. I did a new makeup look every single day. It was all practice and putting myself out there.

Do you have any advice for aspiring beauty vloggers?
The biggest piece of advice I have is to put yourself out there. I notice that people get hung up on the quantity of makeup and the quality of their video. I can’t think of a single YouTuber who did that [in their first video]. If you go back to all of our first videos, they’re awful! When anyone starts off, there’s so much room to grow. Everytime you post a new photo or video, you start to say, “Okay, I need to work on this,” and then the ball starts to roll. You improve little by little, and then all of a sudden you wake up one day and you’re like, Oh, my God! Look how far I’ve come!

Watch Alex Faction’s Pop Art Frankenstein tutorial

What’s the biggest challenge you face when making YouTube videos?
I think the biggest challenge is all of the behind-the-scenes work that people don’t see. I sit down and I film for four or five hours. That’s usually how long the makeup takes. It’s the small details and making sure everything’s perfect. Another challenge for me has been the video learning curve. I started off as a hairstylist and makeup artist. I wasn’t a photographer. I wasn’t a video editor. You have to learn cameras and editing programs and lighting. I think back sometimes and I’m like, Whoa. I can’t believe I learned all of this by myself.

Watch Alex Faction’s Psycho Mask tutorial

Everyone here at Beautylish has been loving your Halloween makeup series. What’s your favorite look?
I really liked the Psycho Mask because it’s so striking [see above]. When you walk into your Halloween party, people are going to be like, “Oh, my God! Who are you?!” The crazy thing about it is that it all cost me under $10 and took about 20 minutes. I like that it’s simple and easy to execute. And people are recreating it flawlessly. That’s what I really like about makeup—I can go onto YouTube and explain something and people are like, “Wow, this is so easy!”

Watch Alex Faction’s Burn Victim tutorial

How does it feel to see people recreating your Halloween looks?
It’s the coolest thing ever. When I see people enjoying a look so much that they’re putting it on their face, I can get choked up. Last year for Halloween I went to Los Angeles, and I saw someone walking down the street in West Hollywood with my makeup on. It was crazy! They didn’t even know me; they probably just grabbed the tutorial from the front page of YouTube. It’s a really cool moment, when I get to see people enjoying their Halloween with something that I created.

Are you doing anything fun for Halloween?
I don’t really know what my Halloween plans are yet! I really want to have my own Halloween, but it’s been very difficult because everyone wants their makeup done. I’m currently in negotiations with a celebrity whose makeup I might fly out to do, so that might end up being my Halloween!

Check out more Halloween makeup tutorials from Alex Faction on his YouTube channel here.


View Original Article

Breaking Up With Sugar

$
0
0

Sugar may be high on your instant gratification list, but that may be because of its addictive nature. Sugar surges through your bloodstream, messing with your energy levels, compromising your health, and leaving you begging for more. How? And what can you do to stop the cycle? Let’s learn how to break up with sugar.

Sugar’s Many Names

The most obvious form of sugar is the white stuff sprinkled into coffee and lurking in soda, cookies, sweetened yogurt, and often in condiments such as ketchup and jam. Cane sugar, brown sugar, and corn syrup are processed, fast-digesting (high glycemic) simple carbohydrates and are best avoided. Raw honey, maple syrup, and agave are less processed and have nutritional attributes. Sure, they are healthy alternatives, but also being high glycemic they should be used sparingly.

Problem with Sugar

There are many not-so-pretty ways that high glycemic foods wreak havoc in the body. Blood sugar swings lead to moodiness, crashing energy as well as more sugar cravings. Collagen and elastin, key factors in firm and beautiful skin, are damaged when the proteins that make up collagen bind with sugar molecules in a process called glycation. The effect is a loss of a youthful plumpness and an acceleration of sagging and wrinkles. Combined with contributing to weight gain, imbalances in the gut, diabetes, and heart disease, the reality of sugar is bleak. 

Noticing The Sugar Fix

If you have a major sweets habit, try noticing if you’re using sugar’s addictiveness as an emotional escape. Take note of where you are emotionally every time you reach for that soda or candy bar. In a kind, non judgemental way, become aware of your habits. Keep a sugar journal: where and when do your cravings arise? Then give yourself love. Try adding in substitutes: sip on fragrant herbal tea, take a brisk walk outside, or try out a fun new nail shade. Have healthy energy bites on hand such as crudité and hummus, strawberries, a few squares of dark chocolate, a handful of nuts or unsweetened dried fruit. The herbal sweetener stevia is a great way to jazz up your favorite beverage. Also, try this great recipe for delicious Divine Health Bars below!

Opt for Nutrient Dense Food

Eating unprocessed fuel is key in adjusting your palate. Refined sugar will begin tasting too sweet. Don’t give up if you’re skin has seen better days - eating a rainbow of mega-hydrating, antioxidant rich fruits and vegetables, good quality fats, drinking plenty of water and getting enough sleep are basics on your way to repairing and maintaining beautiful skin. Leave out foods with hidden sugars from refined flour such as muffins, white bread and pasta; far more beautifying carbs are oats, brown rice, quinoa and sweet potatoes.

When it comes to breaking up with sugar, slow and gradual wins the race. But the rewards are worth it: good looks, contentment, and vibrant energy — all naturally yours when you go for nature’s sweets over a fleeting sugar fix.


Divine Health Bars

These bars are not only a delicious treat but they give you focused energy with many health benefits.

Go for organic ingredients whenever possible; not required but I recommend using sprouted dehydrated almonds and walnuts (available at natural food stores or online at blue mountain organics).

  • 1 cup raw walnuts
  • 2 cups or 14 large medjool dates, pitted
  • 1 cup fair trade raw cacao powder (fair trade cocoa works too)
  • 1 teaspoon cinnamon
  • Dash of sea salt
  • 1/2 cup unsweetened dried tart cherries, soaked briefly in warm water
  • 2 tablespoons ground flax seeds (flax meal)
  • 2 tablespoons coconut or almond butter
  • ½ cup unsweetened shredded coconut
  • 1 cup rolled oats
  • 1 cup chopped raw almonds

Using a food processor blend walnuts until finely ground. Pulse in cacao, cinnamon, and sea salt. While food processor is running add dates one at a time and cherries with ¼ cup of the soaking water. Whirl in the flax meal, coconut or almond butter, and coconut flakes. Stir this mixture with the oats and almonds in a large bowl. Press into a wax paper lined 9x12 pan. Optional: dust with cinnamon or a touch of chili powder Chill and slice into bars. Keeps in the fridge for two weeks.

Get the healthy snacking glow!   


View Original Article
Viewing all 767 articles
Browse latest View live


Latest Images